21 March 2010: After a weekend of working on the car John and I decided to take it for a little test drive around the block. We couldn't take it far seeing as it was not registered. The main reason for the test drive was to see whether replacing the rear transmission mount had fixed the awful clangy engine vibration. The test drive went fine and the noise had gone but just as I went to brake to pull into our street, the brake pedal went to the floor. I quickly aborted the turn and continued in the direction I had been heading. I tested the brakes again and they worked fine. I kept testing them and they kept working fine. John suggested that I had imagined it. Got back to the house OK and left the car in the street so that we could clean the area where it lives. When I went back half an hour later to put it in the garage, the brakes failed completely as I was swinging into the driveway, which is on a downhill slope. Fortunately I kept control of the car and directed it down the driveway at which point it was gathering speed on the downhill slope. I jammed my foot hard on the parking brake which gradually slowed the car to a stop. That was a relief seeing as the only thing to stop the car at the foot of the driveway was our neighbour's loungeroom ! I kept trying the brakes to see if they would recover some braking force but the pedal continued to sink to the floor offering no resistance. Clearly I hadn't been imagining it when they failed earlier on in the evening.
Time to assess what to do. The car was stopped on the downhill-sloping driveway with no service brake. To put the car in the garage I need to get to the bottom of the driveway and then reverse it uphill in a reverse-curve manoeuver and into the garage. The garage door opening is narrow - there is only about 6 inches space on either side of the car - so there is little room for error. Also I find that with the old automatics I have to spin up a lot of oil to get the car to start moving up the reverse incline but once it begins to move it then wants to get away. Normally I have to give the engine lots of throttle and use the brake to limit speed gain. Obiviously without a service brake this was going to be difficult.
In the end I decided to attempt to put the car in the garage using only the parking brake. I didn't really want to leave it outside because that would mean that I would have to fix the brakes outside too. To cut short what is already a long story I managed to reverse the car into the garage modulating the brake pressure on the parking brake. It was a scary manoeuver and the adrenaline was pumping but I got there in the end.
Once that was done we checked the brake fluid reservoir (which we had topped up when the car first arrived) and it was nearly empty. Something was clearly wrong because that much fluid should not disappear in that timeframe. By then it was dark and so we stopped for the night.
John and I speculated on what had happened and came to the conclusion that we weren't sure. We had definitely topped up the brake reservoir when the car first arrived. The seller had clearly stated in the E-bay listing that the brake system had been completely rebuilt with new wheel cylinders and the power boosted mastercylinder, a "Bendix Treadle-Vac" had been overhauled. Why had we experienced such catastrophic failure of an allegedly rebuilt brake system ?
22 March 2010: I topped up the brake reservoir and pumped the brake pedal a few times and then looked carefully under the car for any fluid dripping but there was none. I also checked the back side of each wheel for the tell-tale splashes of brake fluid, indicative of leaking wheel cylinders, but there were none. Next I decided to verify that there were in fact new parts in the brake system and so I climbed under the car with the leadlight and checked all the wheel cylinders and rubber brake hoses. All looked to be in nearly new condition and no sign of fluid egress anywhere. This really only left the Treadle-Vac but it was also allegedly rebuilt.
 27 March 2010:
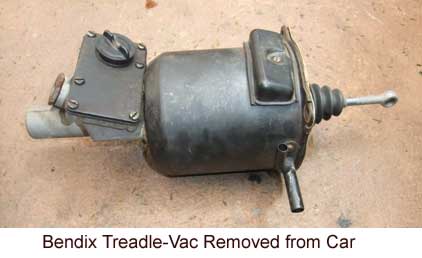
 Moving on to other things while we thought about the brake problem, I was under the car working on the transmission when I glanced up into the engine bay and noticed drips on the bottom of the vacuum boost servo section of the Treadle-Vac. Was that the source of my disappearing brake fluid ? It was the best indication so far and so I checked the book on how to remove the Treadle-Vac. Firstly you have to undo the pivot bolt inside the car which attaches the pedal mechanism to the Treadle-Vac. Then I unscrewed the steel brake line using a tube spanner. I also unscrewed the brake pressure switch and
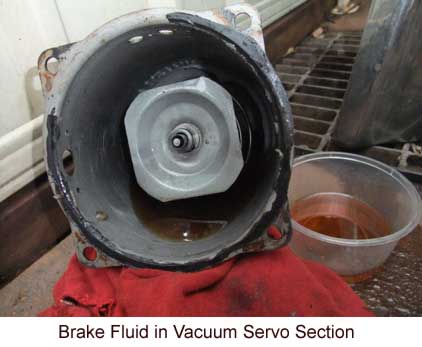
banjo fitting and loosened the residual valve cover. I loosened this while the unit was still attached to the firewall because I (rightly) presumed it would be very tight and would be easier to get loose with the unit anchored to the firewall. Also needed to undo the vacuum hose running to the engine and the one running to the vacuum reservoir, both of which had traces of brake fluid in them, confirming my suspicions that something was very wrong. Finally removing the four mounting bolts, I removed the Treadle-Vac from the car. Straight away I knew something was indeed wrong - as I moved it around I could hear and feel a large quantity of brake fluid sloshing around in the vacuum servo which should have had nothing but air in it. Apparently that's where all the brake fluid was disappearing to... Additionally the rebuilder had sealed the vacuum servo cover with silicone and put the paper gasket between the cover and the firewall mounting bracket. The paper gasket should actually have gone under the servo cover, obviating the need for silicone...so much for the professional rebuild.
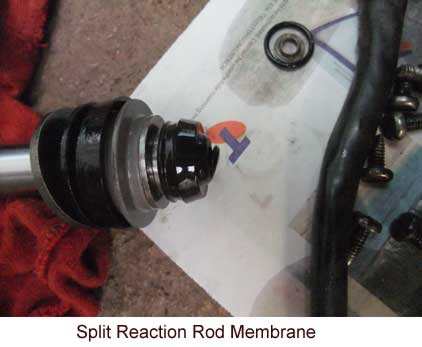
I set about disassembling the unit. As I was working brake fluid was dripping out of the vacuum servo. When I got the servo apart everything inside was soaked in brake fluid and there was a great pool of it inside. All in all I drained about a litre of brake fluid out of it. Apparently the previous owner just kept filling up the brake reservoir when the fluid mysteriously disappeared. I kept disassembling until the very last part I removed revealed the problem - the master cylinder plunger. The plunger, which is pushed into the brake cylinder by foot and vacuum power, and displaces the brake fluid, has a reaction rod down the centre. This reaction rod at one end is in contact with the vacuum valve of the vacuum servo. At the other end it is in the brake cylinder but separated from the fluid by a rubber membrane. The idea of this is to give the
pedal "feel". When braking hard, the pressure in the brake fluid builds up and pushes the reaction rod via the membrane. The reaction rod closes the vacuum valve so that the only brake pressure is from the driver's foot. This is so that when the driver needs to brake hard, the pedal feels like he is braking hard. In my brake cylinder the rubber membrane had split which meant that brake fluid could flow up the centre of the plunger and into the vacuum servo. It's quite a wonder the brakes worked at all.
I went online and bought a rebuild kit but then realised that the kit did not contain the rubber membrane. We searched high and low for the part and contacted lots of places. In the end the place that sold me the rebuild kit got back to me saying they had the part and so I ordered it. Meanwhile
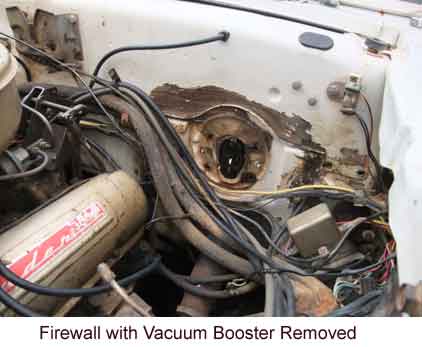
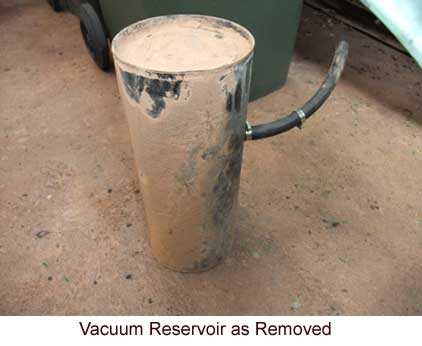
I got to cleaning up all the many Treadle-Vac parts with methylated spirits. Oily cleaners should never be used on brake parts. The vacuum hose leading to the vacuum reservoir had traces of brake fluid in it so I also removed the vacuum reservoir from inside the left fender and removed it for cleaning and repainting.
11 March 2010: With the rebuild kit and reaction rod membrane arrived I could begin reassembly of the Treadle-Vac. John had repainted all the painted parts and I had wire brushed the diecast master cylinder to give it a little shine. I decided to replace all parts that came in the rebuild kit even if the ones in the booster looked like they had been replaced recently. Before assembly I once again cleaned all parts in alcohol to get rid of any remaining brake
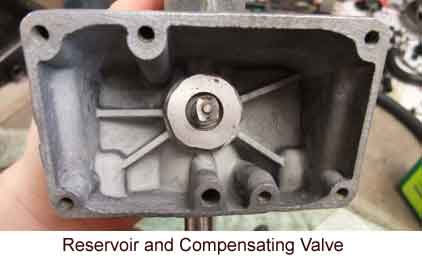
fluid and any dust that had collected on them. First section to go together was the master cylinder containing the new reaction rod membrane, piston cup and leather seal. Also the compensating and residual valves and reservoir cover. The very large nut on the residual valve cover is impossible to get tight without a vise to clamp it in and so I left it finger tight until I had the entire assembly back in the car. Next the master cylinder was bolted to the vacuum servo canister with the rubber seal and cork gasket between. Then I assembled the plunger return spring and then turned my attention to the vacuum piston. I had
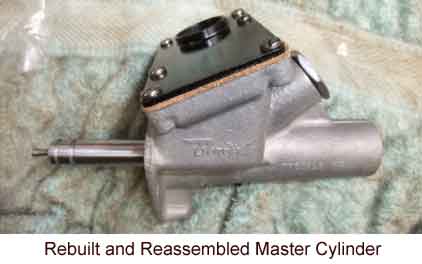
disassembled this as much as possible but was limited because the piston actuating rod is press-fitted into the valve and can only be removed by damaging the valve. I reassembled the piston and valve and attached the vacuum hose to the nipple. Then I fitted the piston leather expander spring and the felt lubricator soaked in paraffin oil. I then brushed paraffin oil around the walls of the cannister and inserted the piston so that the vacuum hose end would line up with the external vacuum port. With the piston positioned I screwed in the external vacuum port tube and affixed the hose to it, and then
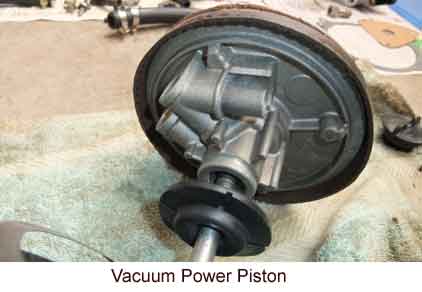
reassembled the atmospheric air intake filter and cover. Then I attemped to actuate the piston but it was very difficult to do since the master cylinder wasn't lubricated with any brake fluid. So then I filled the master cylinder with brake fluid and actuated the piston using my finger to block the residual valve port and another to hold open the compensating valve. This meant that the displaced brake fluid would flow back into the reservoir rather than projecting across the garage. The purpose of actuating the piston is to ensure that the vacuum hose do nor not rub against the cylinder wall.
Finally I replaced the vacuum servo cover
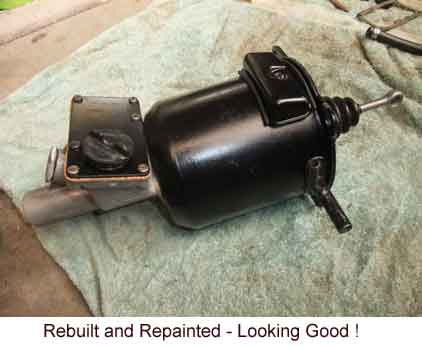
this time putting the paper gasket where it belonged between the cover and the canister. The cover locates with four metal tabs that I was very careful about bending too much. Next I bolted to the firewall the bracket that John had nicely cleaned and painted up and then bolted the Treadle-Vac assembly to it. Then I replaced the brake pedal lever pin under the dash which is difficult to do with the limited access. Lastly I reassembled the brake line and brass banjo and pressure switch onto the master cylinder. Time to bleed brakes but by now it was late and I had had enough.
17 March 2010: John and I duly bled the brakes starting with the wheel cylinder furthest from the master cylinder. Lots of murky brown fluid came out indicating that the fluid in the lines had been there for a long time. The pedal firmed up nicely and we took the car for a drive. The brakes worked fine although there did not seem to be a lot of vacuum assist and while ever there was pressure on the brake pedal, we could hear a faint hissing sound. This didn't seem right and so when we got back we investigated further. We found that while the brake pedal was applied there was a constant rush of air through the atmospheric exhaust port on the power booster. This was not right as the atmospheric exhaust port should only operate momentarily when the vacuum piston moves.
25 March 2010: Over the course of the week I studied the diagrams of the Bendix Treadle-vac to try and work out how vacuum could be continuously leaking when the brake pedal was applied. On the weekend I disconnected the hydraulic brake line again (which will require bleeding again) and removed the Treadle-Vac assembly from the car. I removed the cover plate from the vacuum chamber and connected a length of rubber hose to the vacuum port. I then used my mouth to apply vacuum to the booster while putting pressure on the actuating rod, so as to simulate the brake apply conditions in the car. As observed in the car, air was leaking continuously into the vacuum side of the booster.
Through trial and error I ended up determining that the air was leaking around the leather piston seal. I thus disassembled the piston and valve assembly and found that the piston face was all distorted. It looked like it had been clamped to the valve body with something too thick in the place of the leather piston seal. when the piston face bolts to the valve body with the leather piston seal in between, this is supposed to seal the working parts of the valve. However, with the piston face so distored, there was no chance of it being airtight which is where the air was leaking into the system.
Ideally I would have had a spare brake booster and could simply interchange the damaged part but no such luck. I tried gently to hammer the piston plate out flat against a piece of hardwood but had little success. In the end I used silicone gasket compound to seal around the valve chambers so that when the piston plate is tightened to the valve body, all the gaps created by the distorted piston plate would be blocked with silicone. Not my preferred fix but it was the only solution I had at the time. As I reassembled the the booster I tested it the same way as I tested it initially. This time when I applied pressure to the actuating rod, the vacuum momentarily disappeared as air rushed out of the vacuum side of the piston but then it built up again, indicating that the silicone was sealing the valve properly. I reinstalled the unit in the car and reconnected the hydraulic line, pressure switch wires and vacuum hoses. Even though the hydraulic system was not bled I started the engine and tested the brake pedal. This time when the pedal was depressed there was no continuous hissing indicating that the problem was solved.
1 May 2010: Time to bleed the brakes for a second time.


