 6th-8th February 2010:
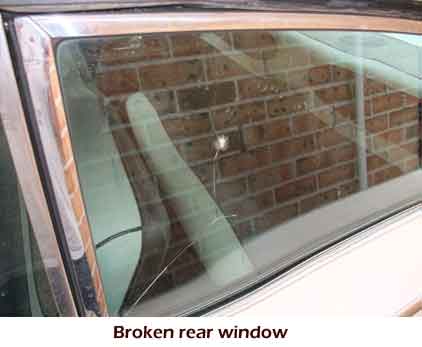
 At some point in my car's recent history both left-hand side windows had been broken. We suspect it might have been vandals since the rear window looks like it has borne the impact of a pot shot. In order for the car to get NSW registration I knew that I would have to replace the glass. Being a hard-top model this is a little more tricky because the window frame is permanently attached to the glass and the whole assembly moves when the window is raised and lowered. Also neither of the rear power windows worked. I suspected this was due to lack of use. Fortunately I could hear the circuit breaker open when working the switch indicating that the electric motor was fine and something was just seized.
The first step was to find replacement glass. When contacting wreckers for other parts I also enquired about glass but any original pieces they had had partially delaminated. I looked for somewhere in Sydney to take the original windows and have new ones cut but didn't turn up much and the few I did find would not do it on the spot. So that would require a day off work to deliver the original windows and another to pick the new ones up. So I turned to the good old USA where Google returned a number of auto glass companies specialising in replacement glass for classic vehicles. I sent them all an E-mail requesting the price and shipping estimate. One replied overnight another replied a few days later. The remainder never replied. My choice was easy - I would order it from the company that got back to me straight away. A company that can't be bothered to reply to a prospective customer with money in hand does not deserve my business. I duly confirmed with Sanders Reproduction Glass what I wanted - front and rear side glass for a 1958 Mercury 4-door hard-top in original green tint (1958 Mercuries with factory air conditioning came standard with tinted glass). I also asked them about reproducing the etch mark from the original glass. They were happy to do that at no extra cost, however, they didn't have a die for the exact date code from my original glass ("710" = "October 1957"). The closest they had, without having to make a new die, was "78" = "August 1957" so I decided to go with that and the glass arrived in Australia about two weeks later, very well packaged in a wooden case.
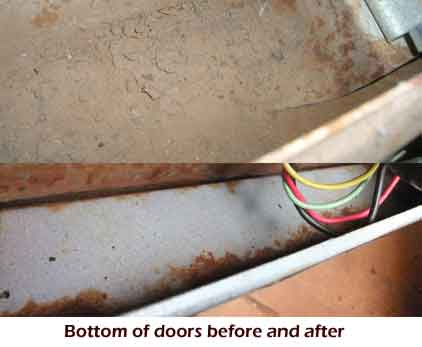
With the new glass on hand we set about dismantling the front left-hand door. We had some trouble removing the inside door opener because our GM clip removal tool was too small for the Mercury handles. In the end a combination of screwdrivers, paint scrapers and steel rulers got the clip off. Then the interior trim panel came off and the reason the vinyl at the bottom was all wrinkly became apparent - some moron (to put it nicely) had at some point reassembled the door minus the plastic sheet that protects the fibre trim board from water that drips into the door cavity when it rains and so the fibre board had rotted all across the bottom. Have to repair that later. We also found centimetres of red dust lying in the bottom of the door blocking all the drain holes. This is one lucky car. But for the fact that it lived its life in hot dry
Texas and Arizona, it would have been a rust bucket given the amount of dirt collected in its cavities and recesses. A thorough hosing of the inside of the door removed all the dirt and cleared the drain holes.
Following the book we continued dismantling - had to remove the power window motor to gain access to the window-regulator-to-window-frame rollers to unclip them. Finally the window and frame was loose and we removed it through the top of the door. With the window out it was easy to see why the window had been so rattly - the Bailey channels and beltline weatherstrips were mostly devoid of any furriness which is what keeps the window located and silent. Have to go shopping for some Bailey channels
and beltline strips...
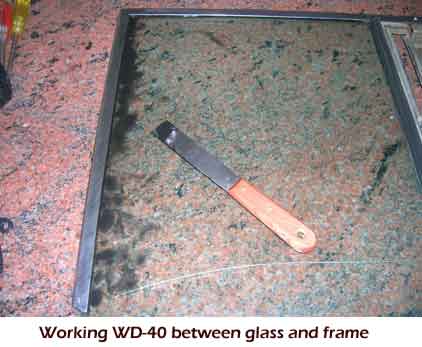
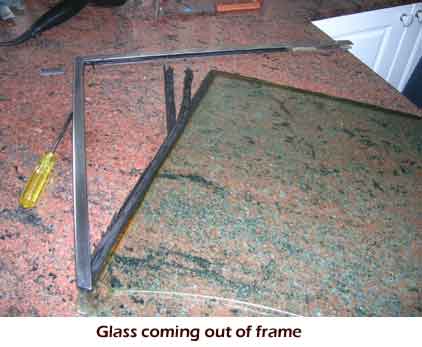
With the window out of the car the fun of getting the glass out of the frame began. The glass is held in the frame with a rubber tape sandwiched between providing a friction fit. We tried to remove the frame initially but had no success. Then we tried heating the frame but also no joy. Finally we applied WD-40 liberally to the rubber-glass edge which seemed to cause the rubber to turn into a sticky black goo. We worked our way along the rubber with a narrow paint scraper, forcing it between the glass and the rubber and working the WD-40 under the rubber. Finally the frame started to separate from the glass and with some prising it finally came off. The window channel (along the base of the glass) we removed just by prising. We didn't use WD-40 on it because we wanted to reuse the rubber on this piece. It was late by this stage so we cleaned up all the frame and channel pieces and packed up for the day. We checked the new front window glass for a size with the old one and it was spot on. Beauty.
 14th February 2010:
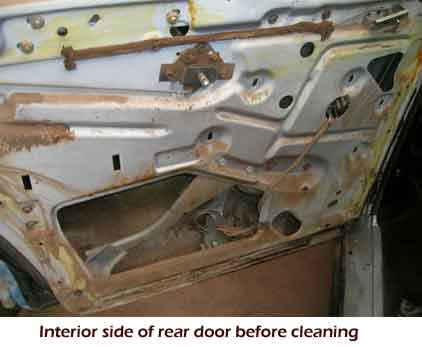
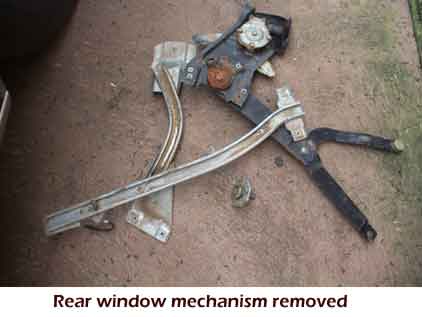
 Time to remove the broken rear side window. I was quite interested in how the rear window worked because unlike the front window where the frame is guided up and down in channels, the rear one has nylon rollers which follow channel guides. Interestingly when the door trim panel was removed there was a length of channel guide lying in the bottom of the door with a nut and bolt. Obviously it had rattled lose many years ago and been lying in the bottom of the door ever since. To get the window out again I needed to remove the window motor. This enabled me to undo the rollers which attach the window frame to the regulator arms. These rollers were so rusted that they would not slide off the pivot stud and I needed to use a screwdriver to lever them off. Once detached from the regulator arms, with
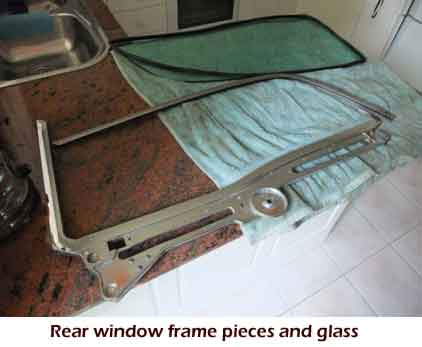
difficulty I was able to remove the window and frame from the top of the door. John and I then worked together to undo the screws holding the window frame together and, unlike the strife we had with the front window, the frame came off with no trouble. We then realised that the rear window is held into the frame with a rubber extrusion unlike the front window which uses glass setting tape. Fortuitously, the rubber extrusion was still in good condition and so we gently removed it for reuse on the replacement glass. We cleaned up the frame and the old piece of glass and then tested the glass for size against the new piece. Oh no. It's different. The new piece is a good bit taller and the bottom two corners are cut away which they are not on the original piece. Very cranky I weighed up my options. Eventually it seemed like the
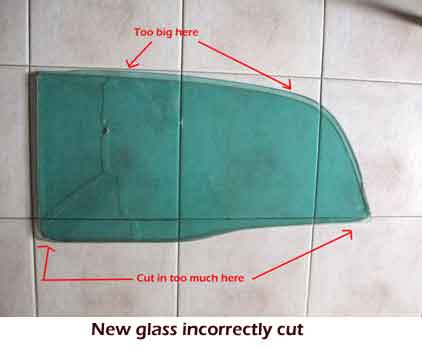
only option was to get another piece of glass cut. This time John had a day off and we had the original window glass as a template so he went to a local place and got another piece cut correctly. Only thing the new piece doesn't have the FoMoCo etch mark. Too bad.
Now with both windows out we could take stock of what we needed to buy - belt line weatherstripping for the inner and outer top edge of the door, rigid Bailey channel for the front edge of the front window to slide in and glass setting rubber for the front window frame. The rear edge of the front window should slide in another rigid Bailey channel but I couldn't find one large enough to accommodate the window frame sliding in it. So in the end I decided to reuse the original steel Bailey channel section and reline it with felt. I placed the order with Scott's Old Auto rubber, a local concern, thinking that would be faster than ordering from the USA. Bad move. Three weeks later the parts arrived after numerous follow-up E-mails.
 28th February 2010:
 I spent a leisurely afternoon removing all the remaining parts from inside the doors and prepping them for reassembly. I removed the window regulators and scrubbed all the dust and grit off them. I then cleaned then all with kerosene to remove all the old grease. Then I ensured the pivot studs were free of rust and then I lubricated the whole mechanism. I removed all the roller channels I could from the back door and cleaned them and regreased them. I also had to remove the front door interior opener mechanism to fix because it had been very loose and wonky. To do this I also needed to remove the front vent window assembly. I then hosed the bottoms of the doors out again to get rid of
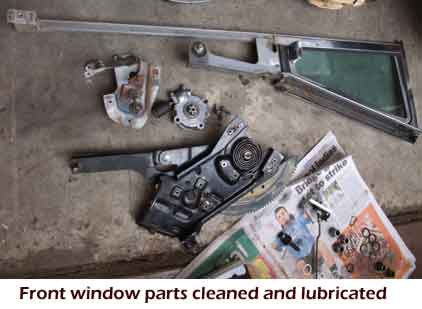
any more dust that had fallen during removal of the parts. Finally I reassembled the rear window regulator and roller channels. I didn't reassemble any of the front door parts because I need to put the vent window back in first and I can't put that back in until I have fixed the opener mechanism. Lastly I lubricated all the opener and lock moving parts with WD-40 ready for reassembly. All in all it was a very productive afternoon.
1st March 2010: YAY the parts finally arrived from Scott's Old Auto Rubber.
2nd March 2010:In the short hour after getting home from work and it getting dark I drilled and ground out the rivets holding
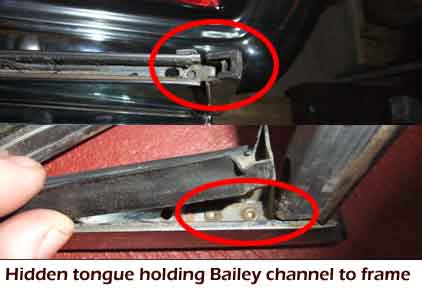
the front of the front window channel to the quarter vent assembly. Things didn't go quite to plan as I didn't realise that the channel actually formed the structural part of that side of the vent window so when I tried to remove it, the trim strip and rubber seal came loose. Also I didn't get the channel completely off because it appears to have a tongue that attaches inside the top edge of the vent window assembly. By this time it was nearly dark so I had to leave it for another day.
3rd March 2010: With a fresh mind I realised that the tongue that was holding the window channel to the vent window assembly was attached underneath the sealing rubber, which fortunately is screwed to the frame at this point. I undid the screws and pulled back the rubber seal enough to get the drill in and drill out the rivets. This finally got the old window channel free of the window assembly.
 4th March 2010:
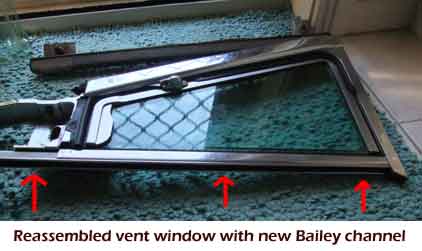
I spent the morning manufacturing a new window channel assembly from the strip of channel that arrived earlier in the week. First I cut the length I needed and then used the angle grinder with a fine blade to cut away the two sides to make the tongue. I then filed the sharp edges. Then I used the old channel as a template do drill all the holes in the correct places on the new channel. Then I bent the tongue to a right-angle and began the slow task of reassembly. It was so slow because I had to replace the old rivets with 5/32" Whitworth screws and in most of the places the clearances were so small that I had to shorten the screws. Finally after a number of hours work I had a brand new fully lined channel attached to the vent window assembly.
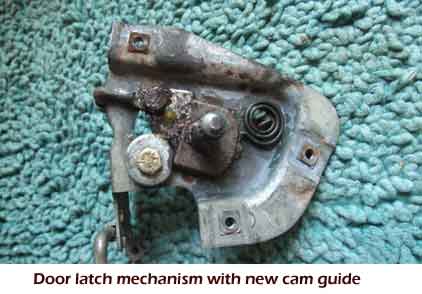
While I was at it I needed to do something with the driver's door interior latch handle which had been very loose and wobbly. When I removed the cam mechanism I could see why. Firstly the spring had broken which was why the handle didn't spring back when moved, and secondly all lubrication appeared to have long gone, to be replaced by dust, which abraded the mechanism every time it was used. So it was very worn away and sloppy. You can't just buy a new one of these so I was going to have to fix it. Firstly I washed it thoroughly to get all the dust out of it. Then I thoroughly lubricated it and put a spring from the back door on it (the spring on the back door opener is easier to replace when I find another one). Finally I created a guide for the cam out of a bolt and a large washer so that the cam sits and slides under the large washer, and there is just enough clearance for the cam to slide side-to-side but not up and down. It now works like a charm !
7th March 2010: Spent a little bit of time today finishing off the front door window. The only outstanding job before reassembly was to make the new outer belt-line weatherstrip piece that fastens to the top edge of the door. The inner piece which attaches to the trim panel can wait until I am ready to install that. Using the old weatherstrip as a template I fabricated a new one using the angle grinder with a fine cutting blade. Using this rather than snips means that the material does not crush and distort during cutting. The downside is that sharp edges need to be filed away afterwards but the result is much tidier. The original weatherstrip is attached with screws at either end and with special clips in between. I removed the clips from the old weatherstrip hoping to reuse them on the new one but they were so rusty they just snapped when bent. They could be annealed but I don't really have the facilities to do this. In the end I just fastened it to the door with two additional screws.
Time for reassembly and everything needed to be done in the right order. Firstly I fastened in the newly manufactured belt line weatherstrip. Next in went the vent window assembly but I didn't attach it because the door opener mechanism needs to wrap around the front window Bailey channel. With all of that positioned I put in all the screws and nuts and tightened it up, adjusting and aligning the vent window for even clearances all round. Next the front window rear channel got screwed in. Next the window regulator assembly. With most of these parts the holes in the door are elongated to allow for adjustments. I was careful to position the screws where the original imprint was left in the paint so that the part would be located exactly as it was before. Next I got the window and greased the two lower roller channels and assembled a well-greased roller in each. Then John helped me lower the window into the door and I then reached into the door and snapped the two rollers on the window frame onto the regulator arm studs. With that in place I made sure the window motor was well lubricated around the shaft and reinstalled it onto the regulator assembly. Now for the test ! I attached the battery clamp and actuated the power window switch and the window glided smoothly and quietly up and down in the new channels, with none of the "ge-glunk-ge-glunk" sound it used to make when sliding in the bare steel channels. Final check - with the window up there was no free movement in it so it won't rattle anymore while driving. The final thing to do was to reinstall the two upper and one lower window stop so that the window would only move through the required range and no more. Job well done !


